Pac Man & Ghosts

I started by make a yellow octagon using the pen tool. Then I brought in one of the anchor points to make a Pacman shape and using the Convert Anchor Point Tool, I made the edges of Pacman round. I used the eyedropper tool to select the colours of each ghost to make swatches to use later. Then I dimmed the image of the ghosts to trace over the outline of one of the ghosts but making the top of it round and smooth using the Convert Anchor Point Tool. Then, I control dragged the one ghost to duplicate it and make four, changing the colour of each according to the swatches. I repeated this step for the eyes but instead of using the pen tool to trace the eyes, I used the Ellipse Tool to create the eyes.
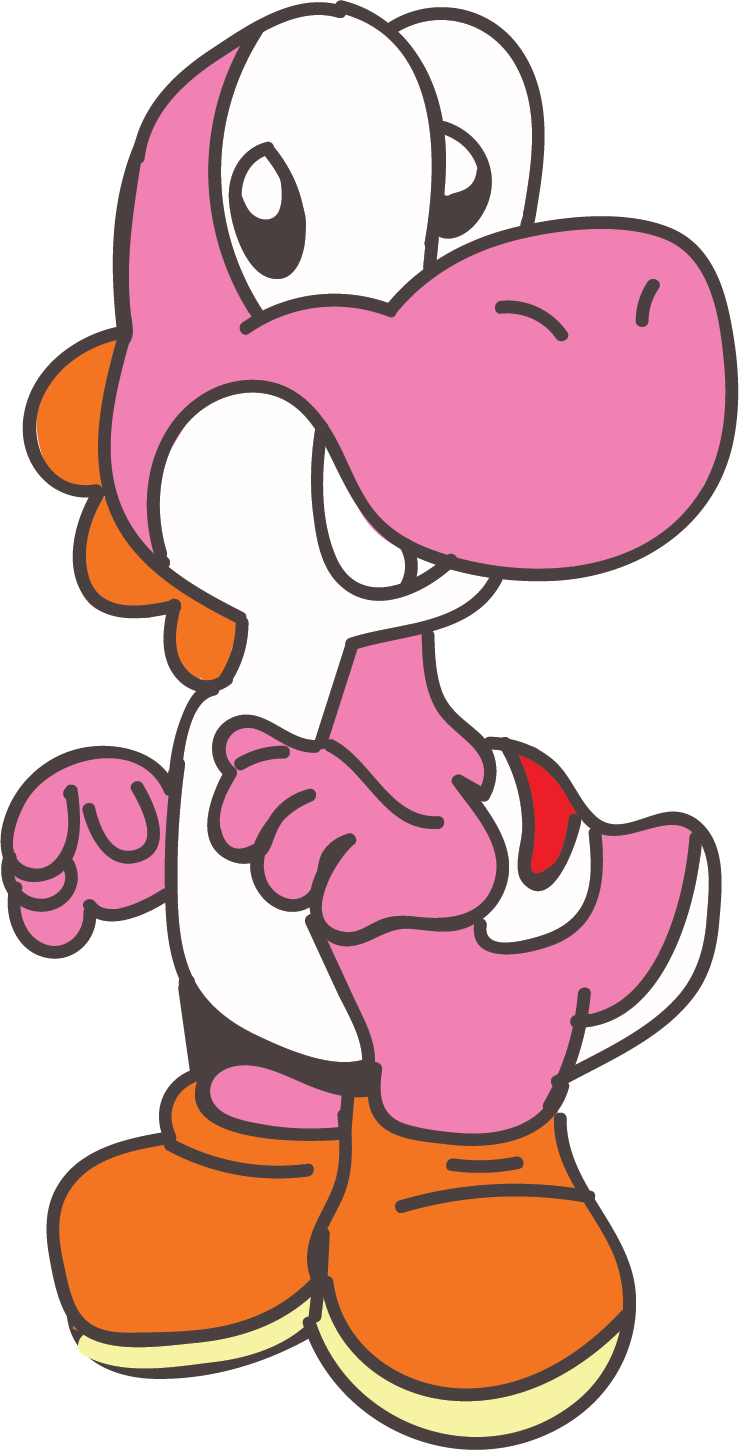
Pink Yoshi
|
I started out by importing a picture of pink Yoshi. Then, I made swatches of the colours. Instead of using the pen tool, we used the blob brush tool in black to create the outline of Yoshi. Then, making new layers, we used the other swatches to colour in the Yoshi outline also using the blob brush tool.
|
Self Portrait
Original image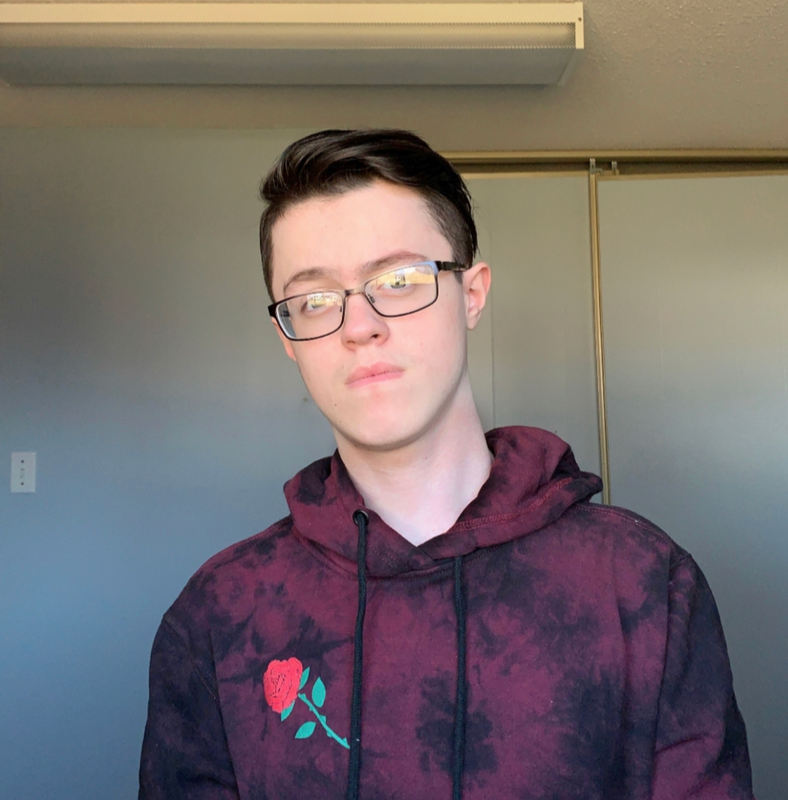
|
Illustrator version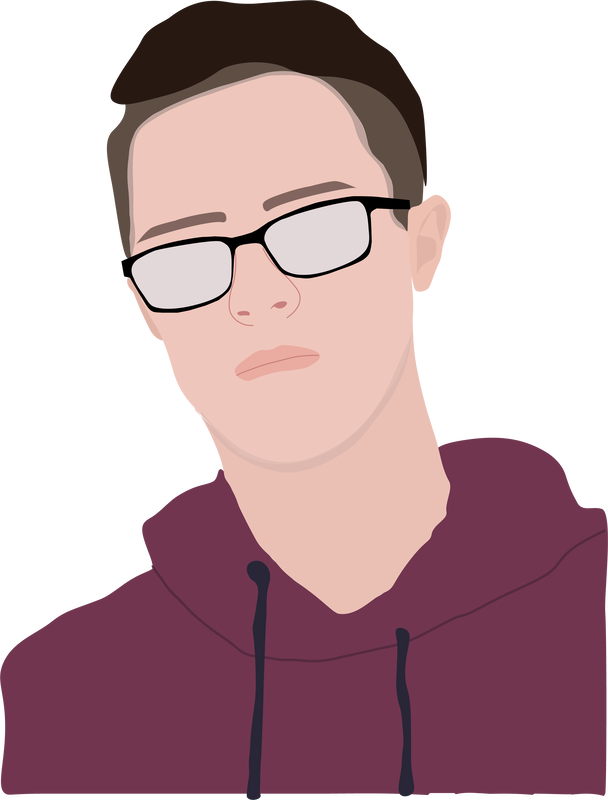
|
For this assignment, I decided to create a cartoon version of myself instead of an actual portrait. I started off by importing the picture I took into a letter sized art board. After I did that, I began to select spots on the image (My skin, hair, outfit, ears, eyebrows, glasses, nose. lips, and neck.) with the eyedropper tool to create swatches. For every part I created a swatch for, I made a new layer for. I started off by creating the base of the face, which is the outline and the skin. I made sure to turn the opacity down so i could see exactly where I was going with my tools. During the process I constantly turned the original photo off and on to make sure everything I was doing was on point, and I also had to create new swatches since the originals weren't the correct tone of colour I wanted for my skin.
